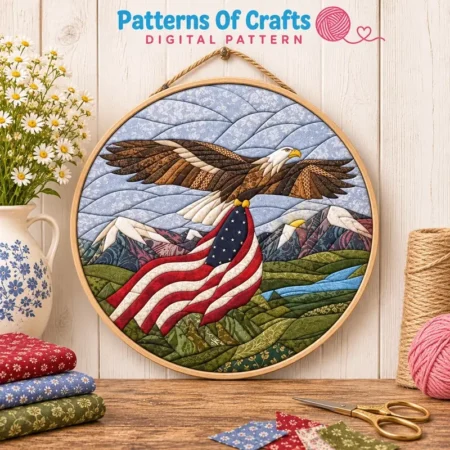
Patriotic kinusaiga turns red, white and blue fabric scraps into wall art, with no sewing at all. This guide shows how to make an eagle and American flag picture in 6 steps, which fabrics to choose, and how to get a clean finish.
On this page
What is patriotic kinusaiga?
Kinusaiga is the Japanese craft of tucking small pieces of fabric into grooves cut in a foam board. The patriotic version uses the same method with American themes: the flag, the bald eagle, and red, white and blue fabrics.
If the craft is new to you, start with what kinusaiga is.
What you need
- A printed pattern, such as our USA Eagle & Flag Kinusaiga Pattern
- Foam board
- Fabric scraps in red, white, navy blue, brown, sky blue and green
- A craft knife
- A tucking tool or a seam ripper
- A frame or a wooden hoop (optional)
Our kinusaiga supplies list explains each item.
6 steps to make the eagle and flag picture
- Print the pattern at 100%. Choose “actual size” in your PDF reader so the picture keeps its true size.
- Transfer the lines and cut the grooves. Copy the lines onto the foam board, then cut shallow grooves along them.
- Cut the fabric. Cut each piece a little larger than its shape, so there is fabric to tuck.
- Tuck the sky and the mountains first. Background pieces go in before the pieces in front of them.
- Tuck the flag, then the eagle. The eagle goes last because it sits on top of everything else.
- Frame it. Use a square frame, or set the picture in a wooden hoop.
For each move in detail, follow our kinusaiga tutorial.
Fabric color tips
- Flag: use a clear red and a clean white, so the stripes stay sharp. A navy fabric with small white dots can suggest the stars.
- Eagle: use two or three browns for the wings and body, and white for the head and tail.
- Sky and mountains: pick soft blues and grays, so the eagle and the flag stand out.
- Hills: two greens are enough.
Thin cotton is the easiest fabric to tuck. See the best fabrics for kinusaiga for more choices.
3 mistakes to avoid
- Printing at the wrong size. If your PDF reader shrinks the page to fit, the pieces will not match a standard frame. Always check that the scale is 100%.
- Cutting the grooves too deep. A shallow groove holds the fabric well. A deep cut weakens the board, and the edges can break when you tuck.
- Starting with the eagle. If you tuck the front pieces first, the background fabric will not fit neatly behind them. Work from the back to the front.
Take your time with the stripes of the flag. Straight, even grooves give clean lines, and clean lines are what make the flag easy to recognize from across the room.
When to display it
This picture suits the Fourth of July and Memorial Day. It also fits an Americana home all year, and it makes a personal handmade gift.
Get the pattern
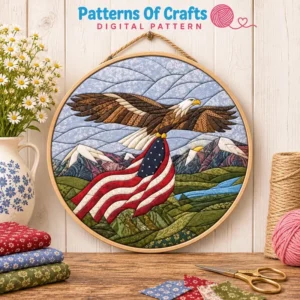
The USA Eagle & Flag Kinusaiga Pattern is an instant PDF download. It shows a bald eagle flying over mountains, with an American flag, green hills and a river. You get:
- an 8.8 x 8.8 inch printable pattern
- a 10.10 x 10.10 inch printable pattern
- a step-by-step illustrated instruction guide
- fabric color suggestions and assembly tips
Want more designs after this one? Try the 13 kinusaiga birds, or browse the kinusaiga pattern shop.